Showing posts with label windy. Show all posts
moved
I've moved my blog to be part of my web site for the time being. I am going to ask someone clever if there is a way to publish here and there at the same time, because I know some people prefer blogger.
But in the meantime, I am here: www hundreds dot ca
desktop calendars
I've made some little desktop calendars for 2013. They're pretty fast to make and fun, so I might make more now that I have the templates.
Auggie desktop calendars are up on the Auggie bloggie. If you are a subscriber to this blog or to the auggiebloggie, I'll let you know directly when the February ones are ready. The calendars are a free download and are formatted for standard home computer, iPad 1 & 2, iPhone and iPhone 5 — you can go to the auggibloggie to find them.
bright snowflakes
I put up a simple tutorial for paper snowflakes up on windy today. We had a lot of fun making these yesterday, as school was cancelled and we were footloose and fancy free.
Windy's Boat
A paper boat for Windy (PDF), from the book Foggy.
Update: you can see photos of the paper boat here.
Windy's Spring scarf

This is a Windy-inspiredproject. As always, Windy is © Judith Steedman and me.
I've been working on some simple children's scarf patterns, loosely inspired by the windy books (since they all wear scarves). This one is a light, cotton scarf (unisex), inspired by Windy's red scarf. It is very simple and quick to knit and a great first project for anyone wanting to try knitting for the first time. It's also a nice project to knit over the summer and wear in September. The pattern also has a cozier muffler-length version for winter.
Here it is: Windy's Spring Scarf. If you are a member of ravelry, you can find it there, too. This is a free pattern.

I used Blue Sky worsted cotton. You can find it online, but check with your local yarn shop, too. Staff at a yarn store are often happy to help customers cast on and get themselves generally figured out!
If you would like to make something for an adult, you can always try the Lonely Doll Scarf.
The Red Balloon

"What does it take to entertain a child? It doesn't take 3D or CGI or talking animals or pop songs or celebrity voiceovers. Children's pleasures are much simpler. The Red Balloon, a 34-minute film by Albert Lamorisse, is a masterpiece of simplicity." —AO Scott., New York Time Critics Picks.
You can find a copy for yourself online SFMoMA or watch it on YouTube.
For more information, see Janus Films (and find out more about the lesser known White Mane, as well).
Labels:
inspiration,
lamorisse,
the red balloon,
watch,
windy
Launch at Kidsbooks

A few weeks ago we launched Foggy at Collage Collage. Now we are preparing for a second launch at Kidsbooks, as part of Simply Read Books' spring book launch. We will be there to present our book, along with some other new books, including Owls See Clearly at Night.
The launch will be from 7–9pm on Wednesday May 5th. You can find more details at Simply Read's blog. We hope to see you there!
How to make a mini kite

There are many ways to make a mini kite. If you would like to make a real kite, there are directions here.)
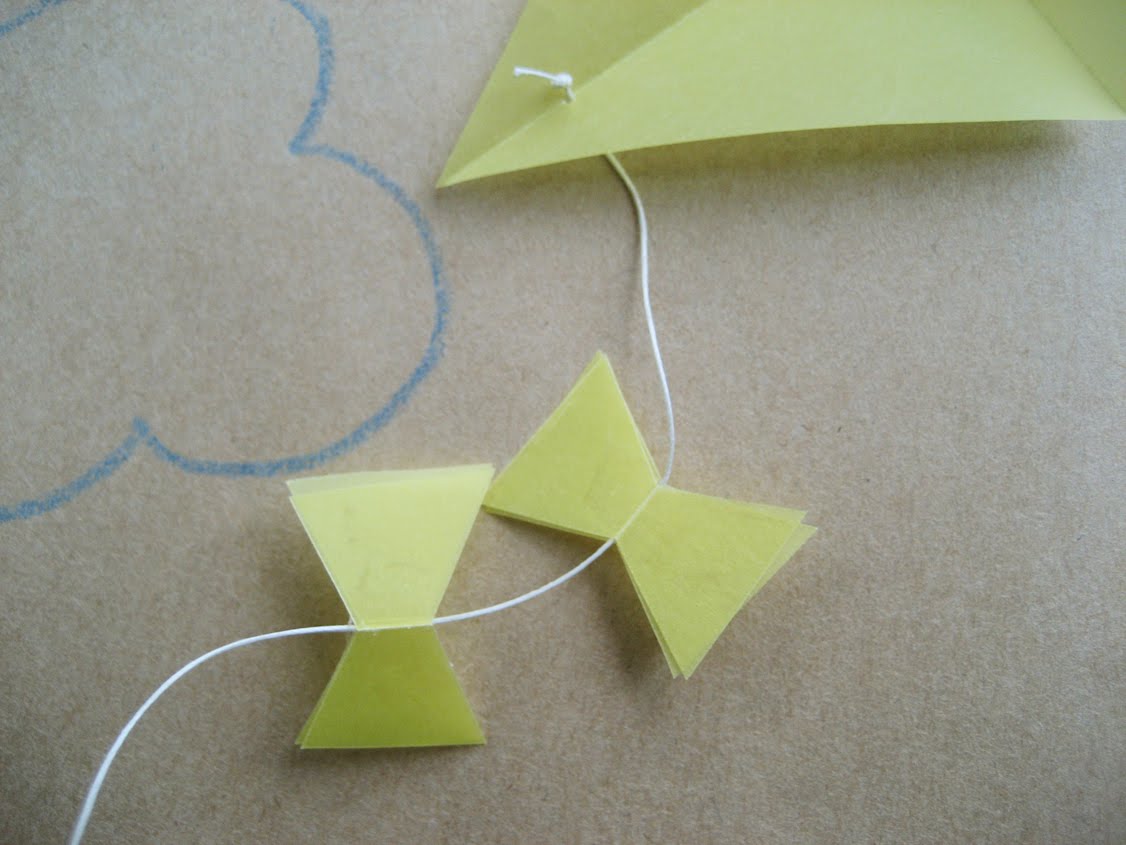
For a real kite the tail is attached to the bottom corner of the kite, separate from the main kite string, but this can get a little bulky on a mini kite. We often just have one main string and attach the bows to that.
Materials: The only special materials we sometime use are cloth covered wire, or florist's wire to make the string stay up in the air. Where you see "tape" or "glue" in the instructions, we often use little bits of double-sided tape as it is more forgiving. But regular tape and glue are ok, too. The kites on these pages use linen thread and wool for string.
Simple folded paper


This is the easiest way to make a kite. You just cut a diamond out of stiff paper (translucent coloured vellum paper works very, very well for this). Firmly fold in half lengthwise and crosswise, unfold. Glue or use a little piece of tape to attach a string or wire to the backside of the kite. Or you can pierce a little hole, pass your string through and knot it. You can also add some bows. Done!
Paper, sticks and glue


Take two small twigs, or sticks or toothpicks and place them crosswise, one on top of the other. Put a daub of glue or tape between them. Wrap some thread around the centre in a figure 8 pattern and knot, leaving one or two long tails. This will be the string and tail for your kite, so leave the ends quite long (this is a bit of a mistake in our photos: we cut them and had to add an extra string after). Knot or glue in place.
Next, place your frame on a piece of tissue or other light paper. Trace a diamond around your frame. Trace a bigger diamond around your first diamond. Cut out the bigger diamond. Fold along the lines of your smaller diamond. Place your frame in the middle of your diamond and if everything is lining up, put a dollop of glue or tape between the centre of your kite frame and the paper. Then glue and fold the edges of your diamond over the frame.
Cut your kite string and tail to the length you want. Decorate your tail with bows or whatever you like. We made vegetable bows for the bunnies' kites last year.
Paper or cloth with stitching
You can use a firmer paper or stiff cloth and stitch around the hem of the kite, using the directions above and the sewing around the hem by hand.
One last thing: you can make a little spool out of a little twig, empty spool of thread, or clothespin, and wind the end of the string onto it. This also acts as a holder.
Windy snapshot

Looking at the bright circles from Sharilyn and Adelaide's sunshine collage made me nostalgic for our first book I did with Judith, Windy. During the shoot Judith took this snapshot. I don't think we'd even finished dressing the set. Even though it wasn't suitable for the book, I loved it and had it pinned above my desk for months (you can still see the hole from the pin in this scan).
Though Windy was set in the autumn, this image is very spring-like and fresh, as if Windy is just about to wake up...which she probably is....

We have started a facebook page. In the true spirit of Windy, we really ought to dispatch updates about our books and projects by semaphore code or messages in bottles, but this is a bit simpler.
Labels:
facebook,
hey hey,
news,
windy,
windy book series,
windyandfriends
Stills
Mini Saskatoon


At the Karma studios one of the toilets had this mini toilet roll (sized for the Wapos characters). We also loved this float plane, which hung above our work area.
Saskatoon


A little more than a year ago, we spent a week in Saskatoon working on an animated version of Windy. We were hosted by Karma Films (producers of the animated series Wapos Bay). It was quite a whirlwind! Hopefully, we will have more updates and information about this, but in the meantime here are a few snapshots from our visit.
Subscribe to:
Posts (Atom)