Showing posts with label crafts for everyone. Show all posts

bright snowflakes


I put up a simple tutorial for paper snowflakes up on windy today. We had a lot of fun making these yesterday, as school was cancelled and we were footloose and fancy free.

Happy day

It's cinco de mayo tomorrow...


You could make a fruit balloon garland, oh happy day via pinterest


Make a pull piñata garland, love + cupcakes via pinterest


My favourite piñata by lieschenmueller flickr, via pinterest


Textile crafts from the Brooklyn Children's Museum

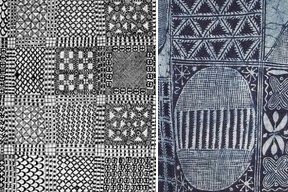
Kente cloth, Adire and Adinkra are different types of patterned textiles from Africa. Kente is woven. The colours of Kente cloth have different meanings (image Kaylor Jones via pinterest).


Adinkra (left), from Ghana and the Cote d'Ivoire, is patterned with symbols. Adire is resist-dyed with Indigo in Nigeria (Adire cloth, c. 1950, Joss Graham).


The Brooklyn Children's Museum has Kente colouring pages, an Adire tutorial, Adinkra symbols, and other textile activities (colouring pages are on page 20).


Auggie trying out the Adinkra stamps at the Brooklyn Children's Museum.


The child-scale grocery store they had there was fun, too.


The boy in the hat was so cute and so nice.

Imperfect hearts and stars


I was remembering a spread in Mirabella about Valentines made by various artists and designers. One was a painting of hearts, all wonky, and underneath it said, "it is for you that I try to perfect my heart." It made an impression on me as a teenager, I thought it was beautiful.

Anyway, I was noodling around with some scraps of paper that evening, and made an impromptu set of Valentines bookmarks for my booky husband.

The heart bookmark, a last-minute valentine (from pinterest). I used some fluorescent paper from a dollar store and some Mr. French Steel Blue Construction paper.

Then, because this valentine is often reading several books at once, I made two more. I punched out a loose pair of constellations, one for each of our signs. Then used scraps of gold, silver and pink to colour in the holes by gluing scraps of paper to the back.


I like the way the backs look — little collages.

the school of things


This summer we visited an exhibition of Lee Ufan (Marking Infinity). It was very relaxing. I loved the rocks on cushions (Relatum) and the repetitive paintings and prints. If you are interested in this type of thing, you can find out a bit more about the movement that Lee was a part of, Mono-ha, and see a video about Ufan here. Mono-ha may translate to "the school of things". This is apparently not a very good translation, but I like it. It seems very vague and inclusive. I feel like I belong to the school of things.


Anyway, I came across our tickets from the exhibition while I was tidying my paperwork today and we decided to do some Ufan-inspired paintings at the kitchen table with the Augs.

Robot Paper Dolls


These are very easy to make, and fun! If you know how to make paper dolls, you can do this freehand, using our instructions below, but we've made up instructions and templates with 2 sizes (PDF).


To make paper dolls, just fold a piece of paper in half lengthwise and cut along the fold, leaving 2 long strips of paper. Then fold one of your strips twice into an accordion fold (so you have 4 panels). Then cut out the shape of robot, making sure not to cut the edge of the arm on the fold. You can use a hole punch to make eyes, or draw them on.

Here is a robot shape (click on image to make it easier to see):


We made some mini-robots out of a scrap of silver paper (using a mini-hole punch for the eyes), too. To make a mini robot, you just fold your initial paper lengthwise twice, cut along the folds, leaving you with 4 long strips of paper. Then take one of the strips and fold it accordion-style into 8 sections. Cut the same shape on the top panel.

How to make a mini kite


There are many ways to make a mini kite. If you would like to make a real kite, there are directions here.)

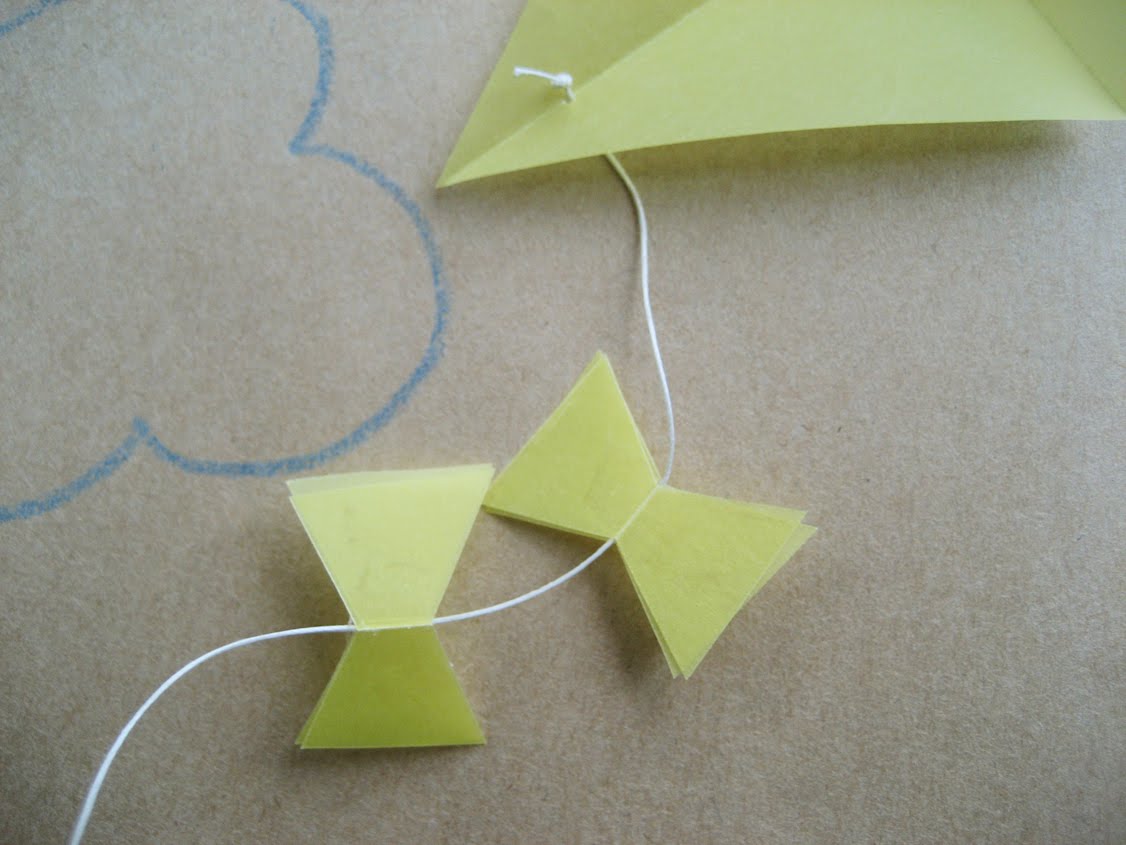
For a real kite the tail is attached to the bottom corner of the kite, separate from the main kite string, but this can get a little bulky on a mini kite. We often just have one main string and attach the bows to that.

Materials: The only special materials we sometime use are cloth covered wire, or florist's wire to make the string stay up in the air. Where you see "tape" or "glue" in the instructions, we often use little bits of double-sided tape as it is more forgiving. But regular tape and glue are ok, too. The kites on these pages use linen thread and wool for string.

Simple folded paper


This is the easiest way to make a kite. You just cut a diamond out of stiff paper (translucent coloured vellum paper works very, very well for this). Firmly fold in half lengthwise and crosswise, unfold. Glue or use a little piece of tape to attach a string or wire to the backside of the kite. Or you can pierce a little hole, pass your string through and knot it. You can also add some bows. Done!

Paper, sticks and glue


Take two small twigs, or sticks or toothpicks and place them crosswise, one on top of the other. Put a daub of glue or tape between them. Wrap some thread around the centre in a figure 8 pattern and knot, leaving one or two long tails. This will be the string and tail for your kite, so leave the ends quite long (this is a bit of a mistake in our photos: we cut them and had to add an extra string after). Knot or glue in place.

Next, place your frame on a piece of tissue or other light paper. Trace a diamond around your frame. Trace a bigger diamond around your first diamond. Cut out the bigger diamond. Fold along the lines of your smaller diamond. Place your frame in the middle of your diamond and if everything is lining up, put a dollop of glue or tape between the centre of your kite frame and the paper. Then glue and fold the edges of your diamond over the frame.

Cut your kite string and tail to the length you want. Decorate your tail with bows or whatever you like. We made vegetable bows for the bunnies' kites last year.

Paper or cloth with stitching

You can use a firmer paper or stiff cloth and stitch around the hem of the kite, using the directions above and the sewing around the hem by hand.

One last thing: you can make a little spool out of a little twig, empty spool of thread, or clothespin, and wind the end of the string onto it. This also acts as a holder.